Running Jupyter Notebook on Google Cloud Platform
Originally published in Chinese on 2018-12-14; this English edition preserves the original scope and technical context.
Introduction
This article is taken from Running Jupyter Notebook on Google Cloud Platform in 15 min, mainly introduces how to build a server on Google Cloud Platform, and install and run Jupyter Notebook on the server.
Server setup
Create account
First create an account on Google Cloud Platform.
Create new project
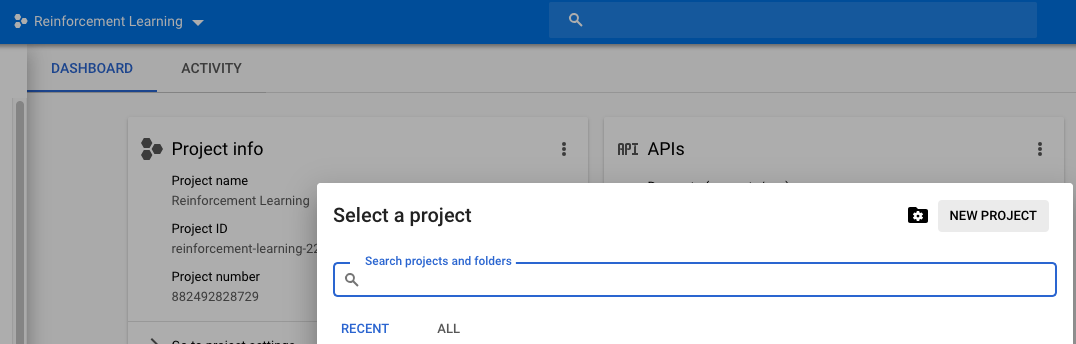
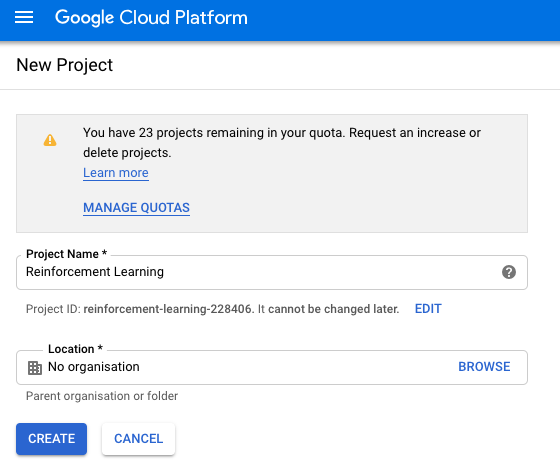
Click the three dots to the right of “Google Cloud Platform” in the upper left corner and click “NEW PROJECT” to create a new project.
Create a virtual machine
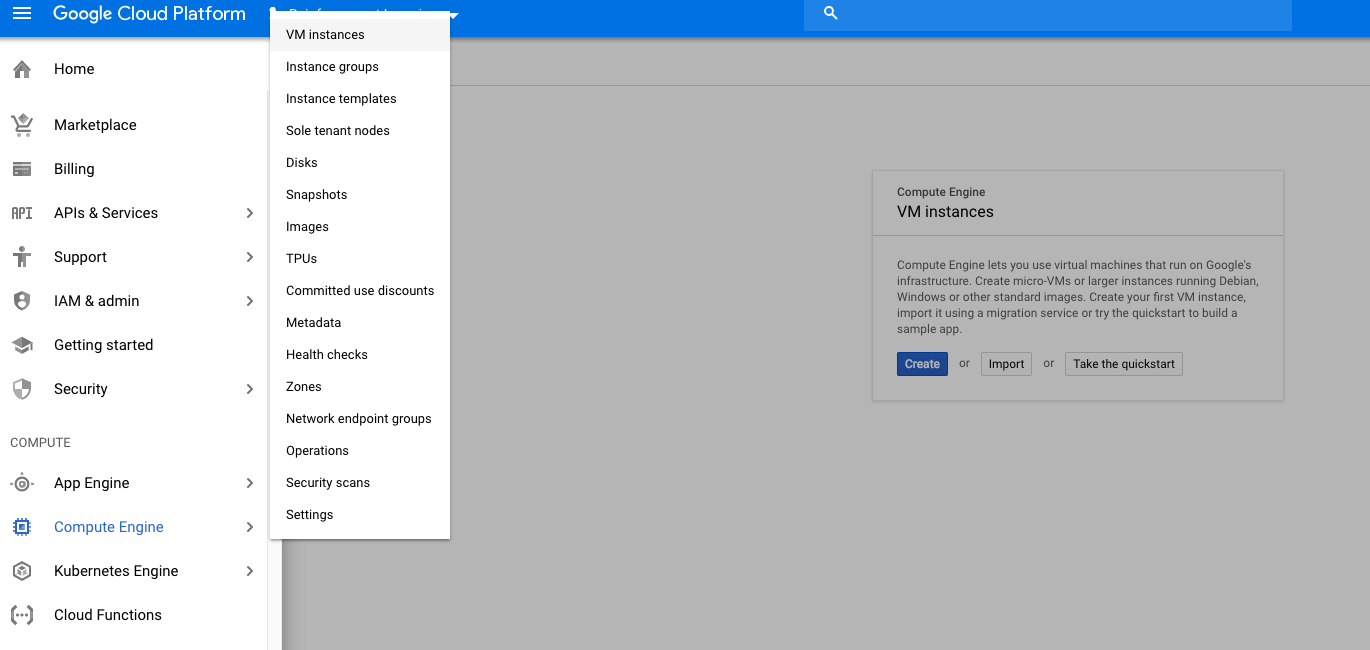
Enter the project you just created and click Compute Engine -> VM instances from the left sidebar to enter the virtual machine page. Click Create to create a new virtual machine instance (VM instance)
 )
)
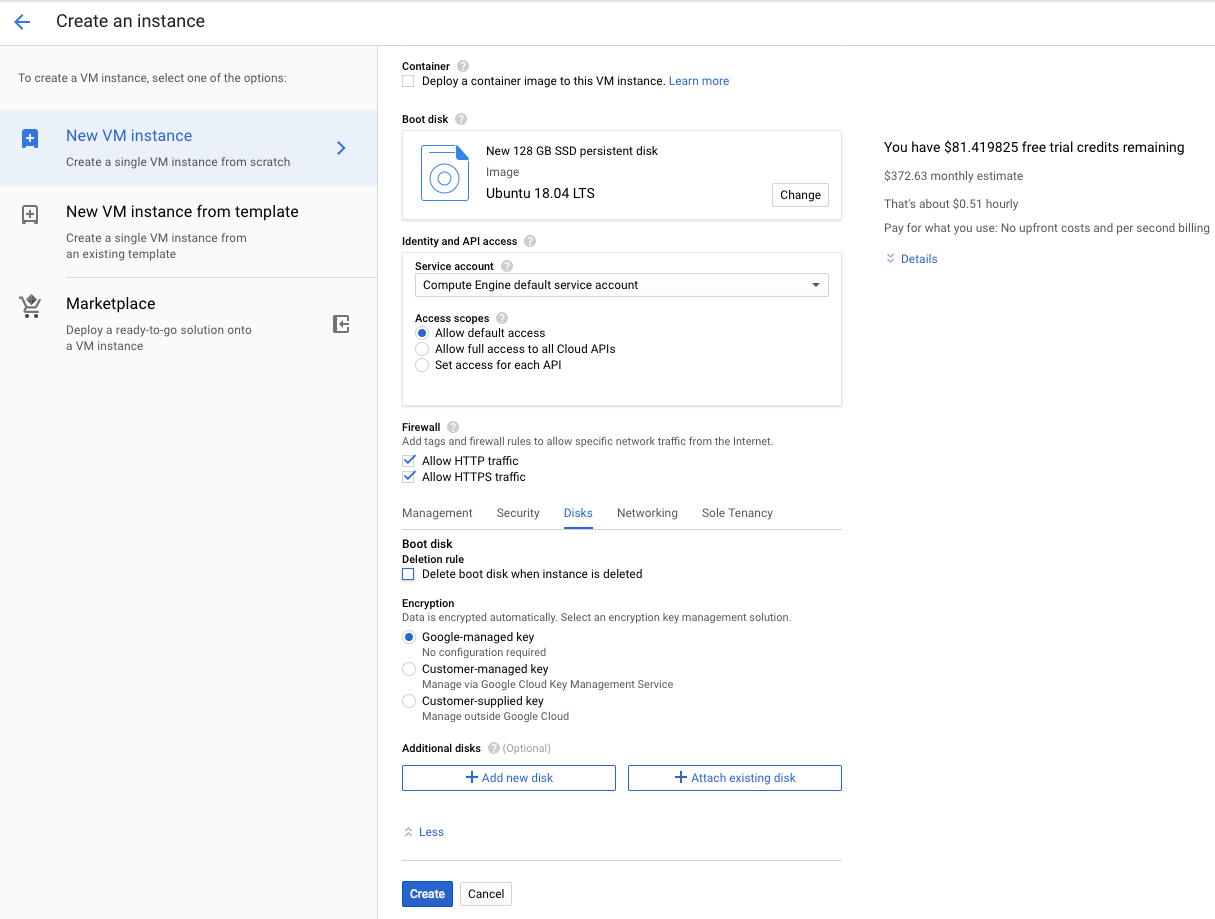
Fill in and select Name, Region, Zone, Machine Type and Boot Disk as required. Select Allow HTTP traffic and Allow HTTPS traffic in the Firewall options, and uncheck Delete boot disk when instance is deleted in the Disks tab below. Finally, click Create, and the virtual machine instance is created.
Set static IP
By default, the external IP changes dynamically. In order to facilitate access to the server, we can set it to static.
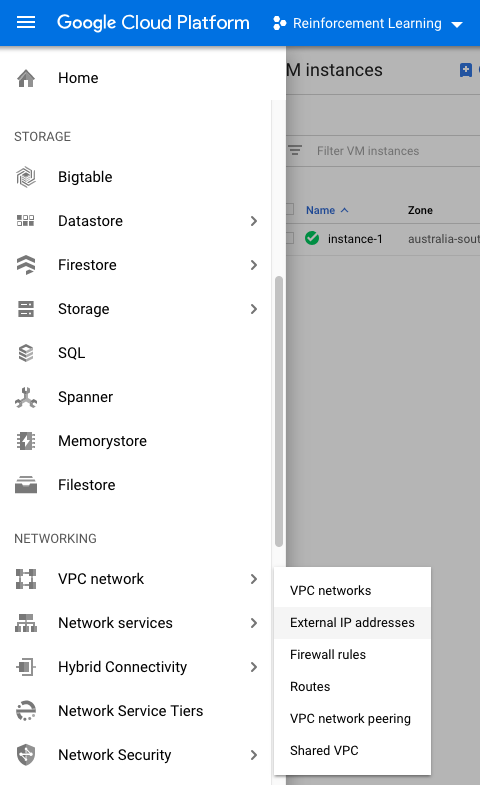
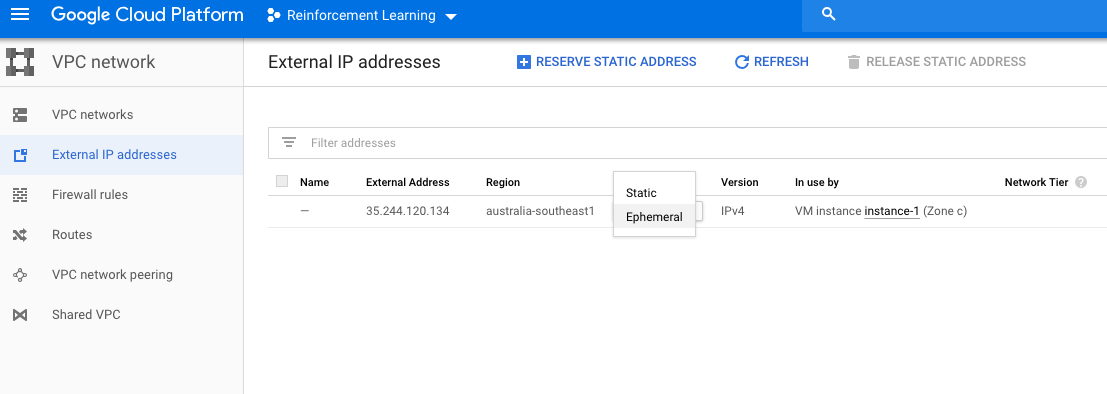
Click VPC Network -> External IP Address from the left sidebar. You can see all the virtual machines under the current project. Click the Type label and Static label corresponding to the virtual machine instance in order to set the external IP address to static.
Set up firewall
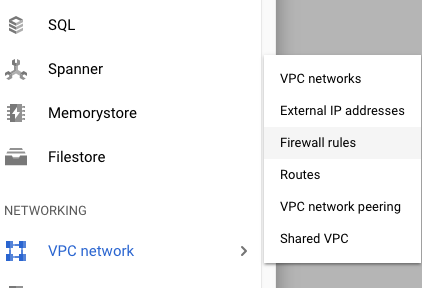
Click VPC Network -> Firewall rules from the left sidebar, click CREATE FIREWALL RULE above to create a new firewall rule.
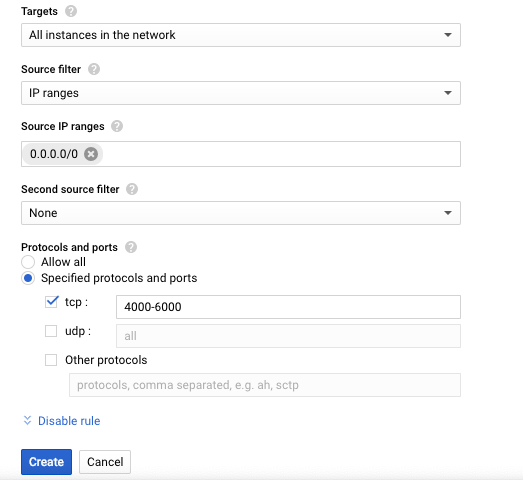
Fill in the Name as required, check Targets as All instances in the network, fill in 0.0.0.0/0 in Source IP ranges, check tcp in Protocols and ports, and fill in a port range for later access to Jupyter Notebook.
Connect to virtual machine
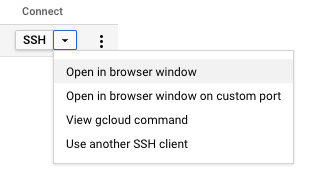
Go back to VM instances and connect to the virtual machine you just created based on the external IP address. You can connect directly from the web terminal provided by Google or through other means. Putty can be used under Windows, and SSH connections can be used directly on Linux and Unix systems.
Configure Jupyter Notebook
Install Jupyter Notebook
Enter wget http://repo.continuum.io/archive/Anaconda3-4.0.0-Linux-x86_64.sh in the terminal
Get the Anaconda 3 installation files
Next enter bash Anaconda3-4.0.0-Linux-x86_64.sh
Run the file and follow the on-screen prompts to install Anaconda 3.
After installation, read the startup file source ~/.bashrc
to use Anaconda 3
Modify configuration file
Create a Jupyter Notebook configuration file jupyter notebook --generate-config
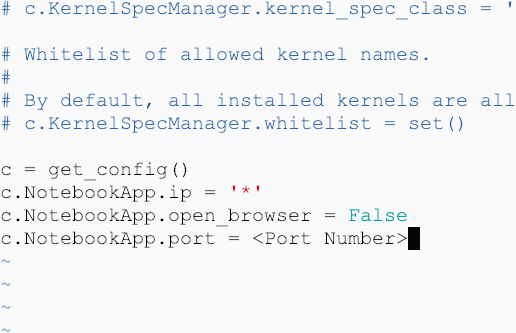
Use Vim or other editor to open the configuration file vi ~/.jupyter/jupyter_notebook_config.py
Add the appropriate settings to this file
c = get_config()
c.NotebookApp.ip = '*'
c.NotebookApp.open_browser = False
c.NotebookApp.port = <Port Number>
Fill in the port number used by Jupyter Notebook in <Port Number>. The port number should be within the port range of the firewall rule. Otherwise, Jupyter Notebook will not be accessible through the external network IP and port number. After filling in, use the :wq command to save the file.
Start Jupyter Notebook
Finally, type in the terminal
jupyter-notebook --no-browser --port=<Port Number>
to startJupyter Notebook,Of course you can also use
nohup jupyter-notebook --no-browser --port=<Port Number> > jupyter.log &
The directive ignores the hang signal, keeps Jupyter Notebook running in the background, and outputs console information to the jupyter.log file.
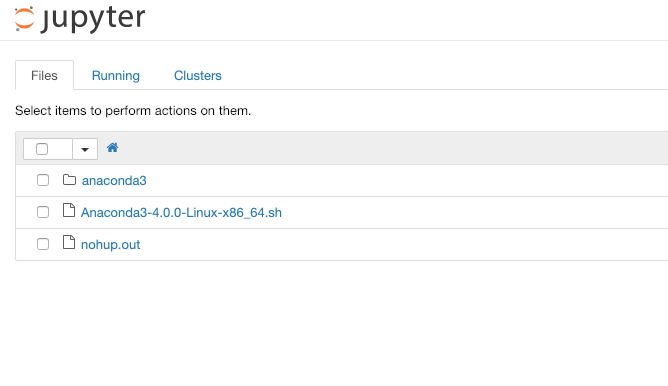
Finally, enter the IP address and port number (for example, 156.73.83.51:4813) in the browser to open the Jupyter Notebook!
References
Running Jupyter Notebook on Google Cloud Platform in 15 min